My Complete Guide to Minecraft's Debug Screen in 2026: From Coordinates to Advanced Navigation
Let me tell you, as someone who's spent countless hours lost in caves or searching for that perfect spot to build, the F3 debug screen in Minecraft isn't just a fancy overlay—it's my survival toolkit. I remember when I first discovered it, pressing that key felt like unlocking a secret developer mode that transformed how I played the game. Suddenly, I wasn't just guessing where diamonds might be or wondering why mobs kept spawning near my base; I had data, real numbers that gave me control over my blocky universe.
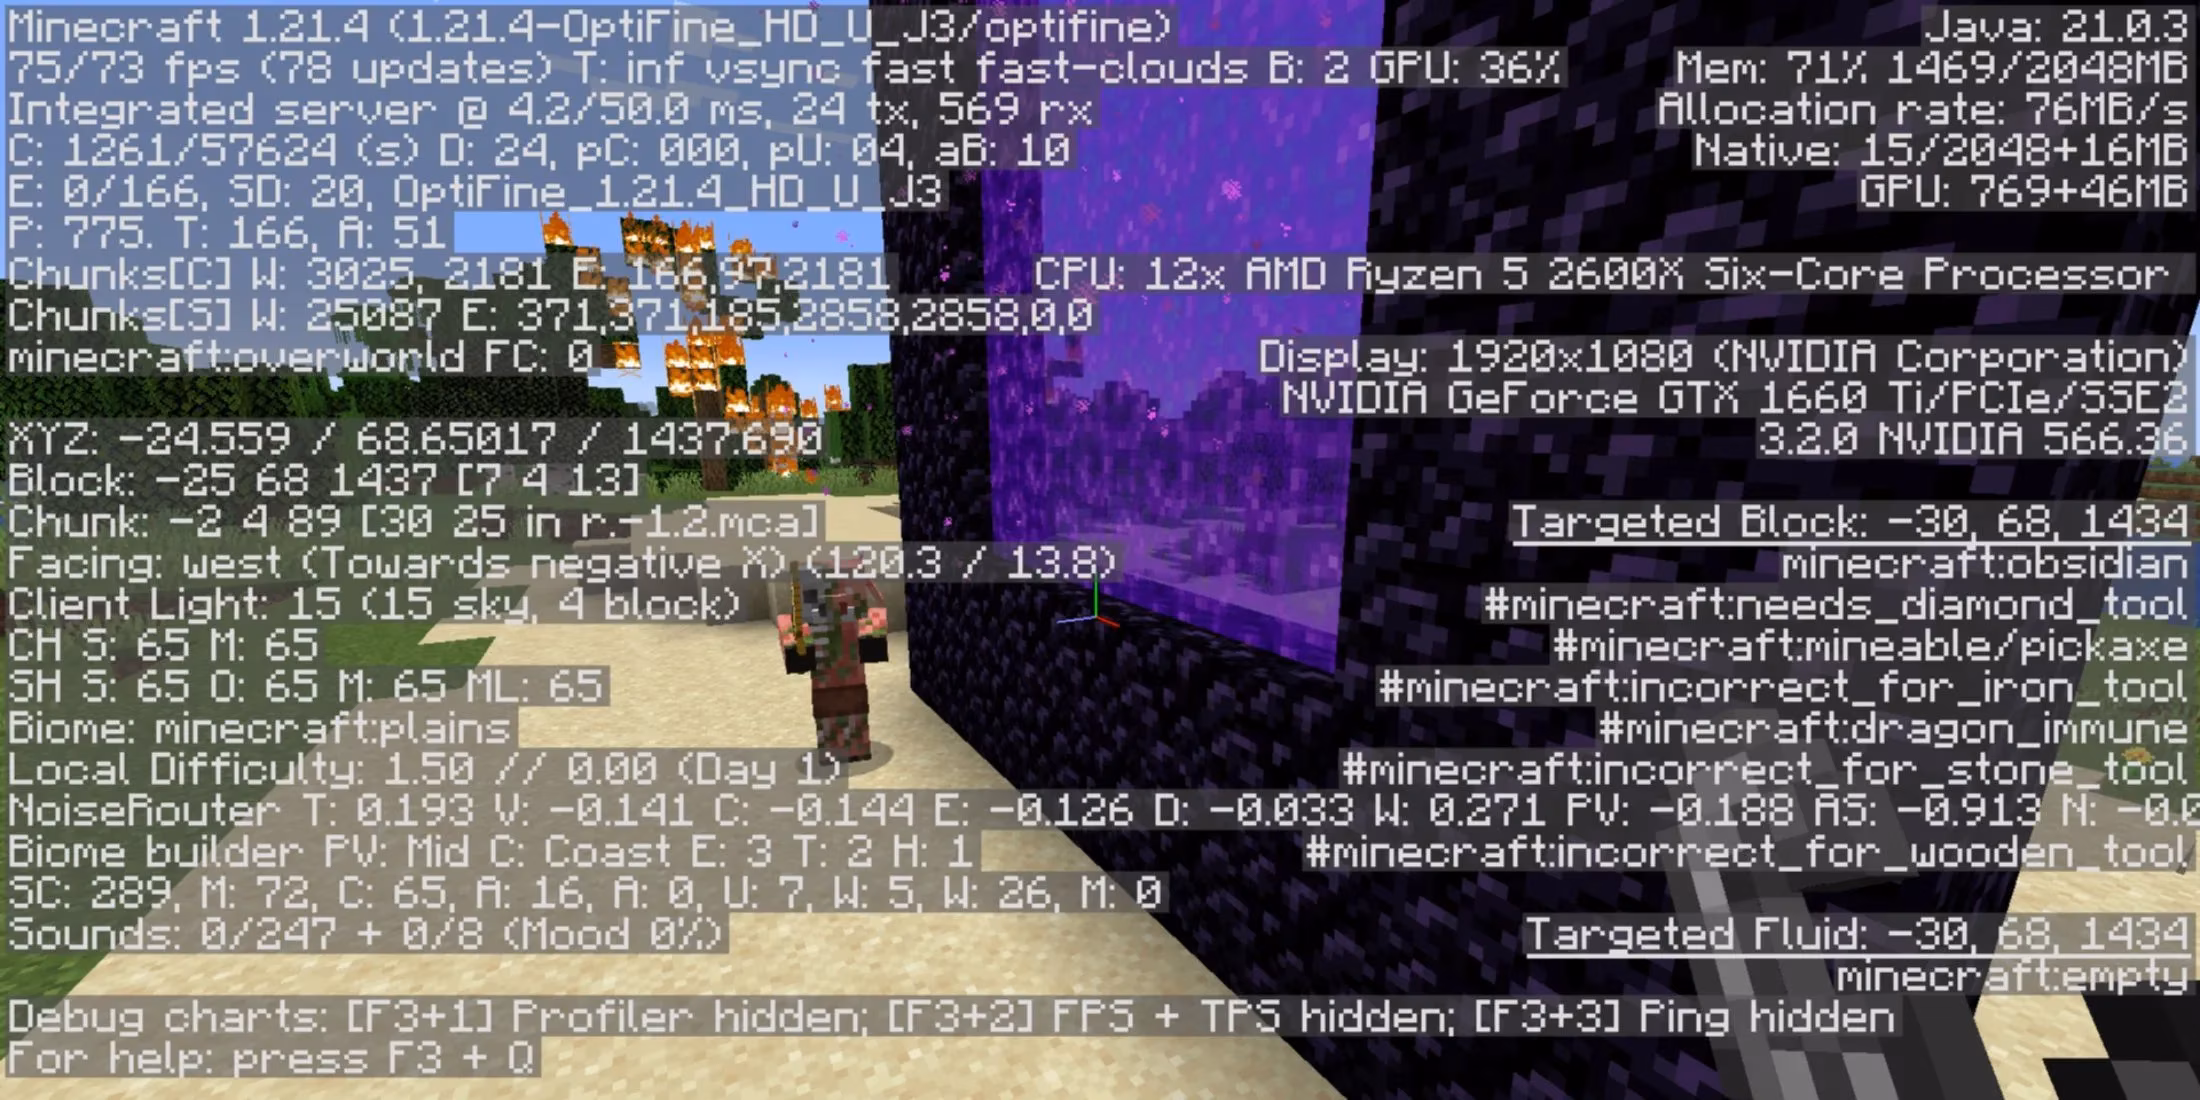
The default keybind remains F3, and pressing it floods your screen with information that might look overwhelming at first. But trust me, once you understand what you're looking at, you'll wonder how you ever played without it. That overlay shows everything from your exact position in the world to how many entities are loaded around you, the game version you're running, and even technical details about your system's performance.
Here's what I use most frequently from the debug screen:
-
Coordinates (XYZ): My absolute go-to for navigation
-
Facing Direction: Perfect for aligning builds or finding my way back
-
Light Level (Client Light): Crucial for mob-proofing areas
-
Biome Information: Helps with resource gathering and building planning
-
Chunk Borders: Essential for technical builds and farms
When I'm mining for diamonds—still the most exciting part of Minecraft for me—I don't just dig randomly anymore. I check my Y-coordinate because diamonds spawn most frequently between Y=-64 and Y=16 in 2026's Minecraft versions. Before the debug screen, I'd spend hours mining at wrong levels and coming up empty-handed.
Let me share a table of the most practical uses I've found:
| Information Type | Practical Application | Why It Matters |
|---|---|---|
| XYZ Coordinates | Navigation & Waypoints | Never get lost again |
| Light Level | Base Security | Prevent hostile mob spawns |
| FPS & Chunk Updates | Performance Monitoring | Identify lag sources |
| Biome Data | Resource Gathering | Find specific materials |
| Entity Count | Mob Farm Efficiency | Optimize spawning conditions |
The light level information alone has saved my bases more times than I can count. I used to build elaborate torch networks only to still find creepers in dark corners. Now, I simply walk through my base while watching the 'Client Light' value. Any spot showing 7 or below gets immediate lighting attention since hostile mobs need light level 8 or higher to not spawn.
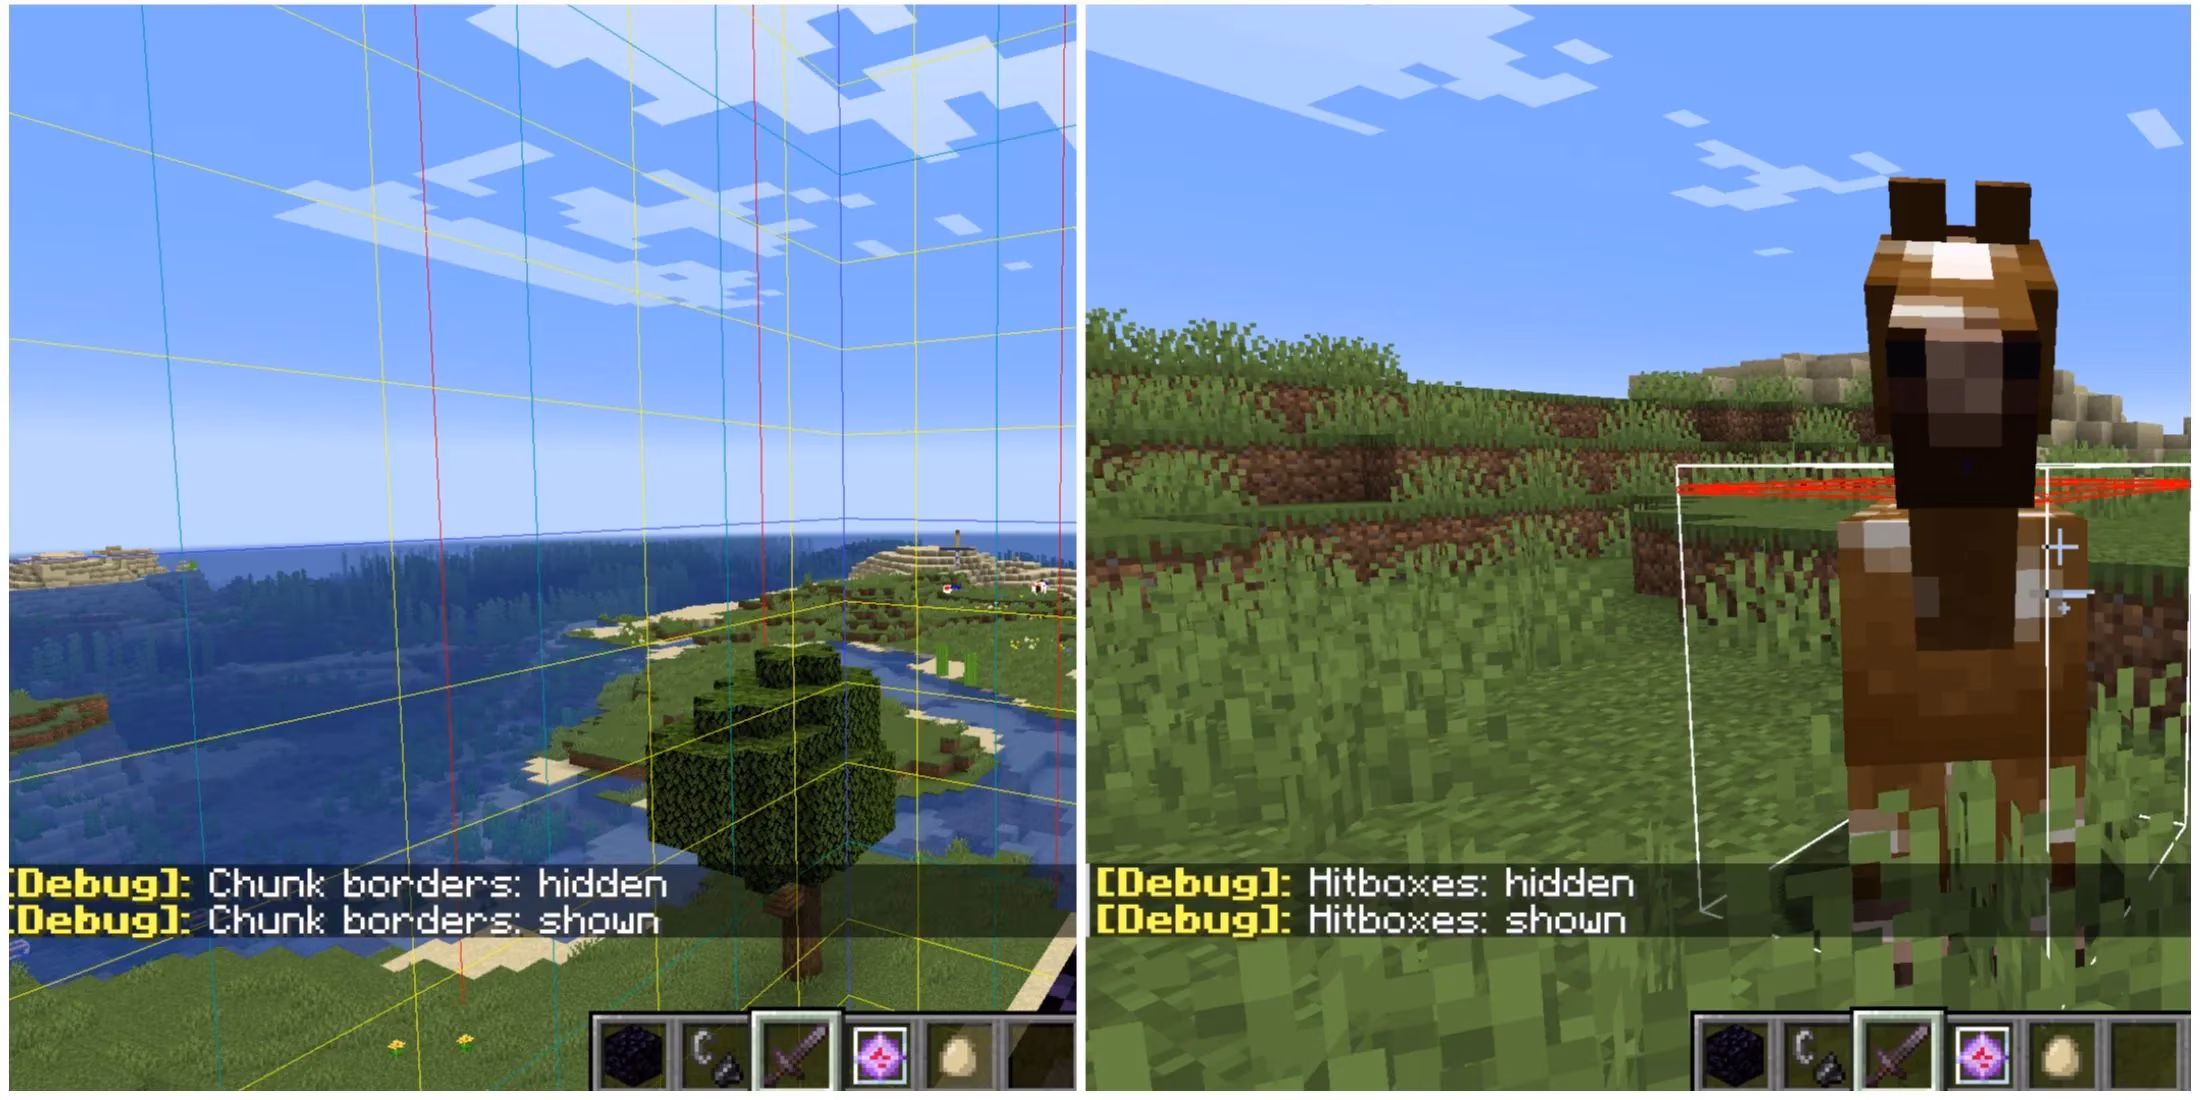
What really changed my gameplay was discovering the debug screen's advanced combinations. Did you know F3+G shows chunk borders? This is game-changing for technical players building mob farms or redstone contraptions that rely on chunk loading behavior. Or F3+B that displays hitboxes? Perfect for perfecting your PvP skills or understanding mob behavior patterns.
Here's my personal workflow when starting a new world:
-
Initial Exploration Phase
-
Keep F3 open to track coordinates of interesting locations
-
Note down coordinates of villages, temples, or unusual terrain
-
Monitor biome changes as I travel
-
Base Building Phase
-
Use light level readings to mob-proof the entire area
-
Check chunk borders to optimize farm placements
-
Monitor FPS during construction to avoid lag-inducing designs
-
Resource Gathering Phase
-
Diamond mining at optimal Y-levels using coordinates
-
Nether travel using coordinate math (8:1 ratio)
-
Stronghold location using thrown eye of ender angles
Speedrunners have known this for years, but even casual players like me benefit tremendously. When I'm hunting for bastions in the Nether, I don't wander aimlessly anymore. I use the debug screen's entity count and my coordinates to systematically search areas, dramatically reducing my search time.
The right side of the debug screen shows system information that's more technical but still useful. I keep an eye on my FPS (frames per second) when building complex redstone machines or exploring new terrain. If I notice sudden drops, I know to check what's causing it—maybe too many entities loaded or an overly complex automatic farm running nearby.
Whether you're playing single-player or on a multiplayer server in 2026, mastering the debug screen creates a completely different experience. It's the difference between feeling like you're at the mercy of the game's randomness and feeling like you truly understand and can manipulate your environment. The learning curve exists, but once you internalize what each piece of information means, you'll find yourself pressing F3 reflexively throughout your gameplay sessions.
My advice to newcomers? Don't try to understand everything at once. Start with coordinates—just getting comfortable with knowing where you are and how to return to important locations. Then add light levels to your repertoire. Then chunk borders. Before you know it, you'll be using the debug screen like a seasoned technical player, optimizing every aspect of your Minecraft experience with data-driven decisions that make survival not just possible, but masterful.
Comments Area